Sample AngularJS App in ServiceNow that demonstrates a Controller
In this particular tutorial, we are going to cover AngularJS controllers and how you can set them up in ServiceNow.
Please note, as a prerequisite, you should check out my prior blog posts:
- Getting AngularJS Libraries into your ServiceNow instance
- Angular in ServiceNow: Tutorial #1 – Model Basics
What is a Controller
A controller element sets up an AngularJS Scope within an HTML element container. The controller allows you to add functionality to an element or group of elements. Any Models contained within a controller is limited to that controller’s scope.
You can do two main things with a controller. 1) Set up initial values with the Scope by using a controller constructor function; 2) Add behavior to the Scope through user and browser events.
Use Case
In this tutorial we will build a simple form. In this form you can enter in a custom spice. You will then have the option of clicking two buttons. The first will be a “Chili” button. If you click this, then text will appear saying that the chili is very spicy. The second button will be the “Custom Spice” button. If this button is clicked then the text appears saying that item you entered into the input field is the spicy food.
We will start with the following basic Jelly/HTML code:
1 2 3 4 5 6 7 8 9 10 | <j:jelly trim="false" xmlns:j="jelly:core" xmlns:g="glide" xmlns:j2="null" xmlns:g2="null"> <div style='padding:40px;'> <div> <input/> <button>Chili</button> <button>Custom spice</button> <p>The food is spicy!</p> </div> </div> </j:jelly> |
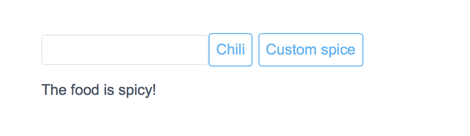
This code produces a form that looks like this:
Set up the Library and Angular App
Now, we need to reference the AngularJS libraries. I have installed them on my instance already. You can do so in a number of ways. A couple of ideas include:
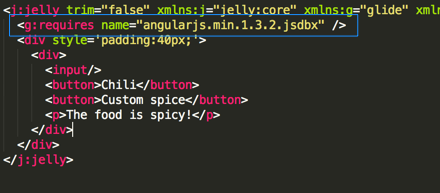
Referencing the AngularJS library that I loaded separately
Declare and then Reference the Angular App
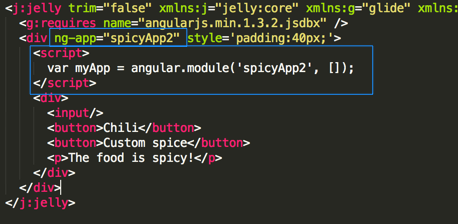
My AngularJS definition and reference.
Create a Controller Code
As you may recall, a controller can both set up initial scope variables as well as connect events to functions to perform actions. In our example, we will set up the controller with both the constructor and a function that sets the spice variable whenever it is triggered. Controller definitions do get a little funky, so let’s break it up a bit.
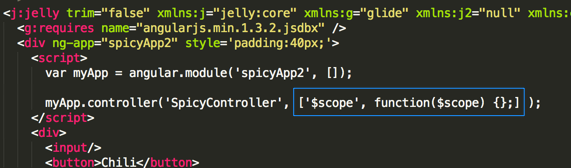
In order to create a controller, you use the “controller” function on the angular module object. In our case, the angular module is “myApp”.
The controller function takes two parameters. Simple, you may say, but watch out for that second parameter because it’s a doozy!
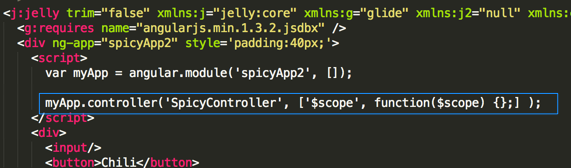
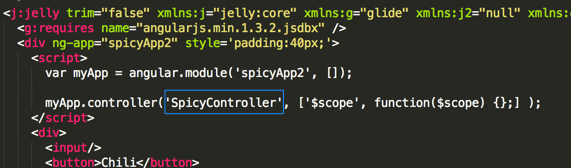
The first parameter is the name of the controller.
The second parameter is a list of items. The first item in this list will be the Scope variable. The second item in the list will be the Constructor function (fully defined).
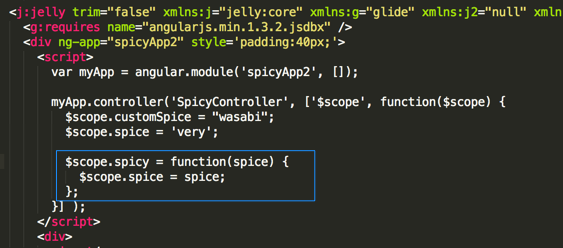
Right now, we just have a shell of a constructor that does nothing. Let’s set up some initial conditions. In this example, we are going to set two variables with some default values. These variables are the “customSpice” and “spice” variables.

Now we want to also add a function to the controller so that when buttons are pushed, we change things. We will add a function called “spicy”. That function will take in a spice name. Whatever is passed in there, we will set on the “spice” variable within in the controller’s scope.
Add the Angular controls to the Jelly/HTML
Now that the scripting is set up, we need to prep the Jelly code so that the Angular controller, model, and events are tied into the HTML based UI.
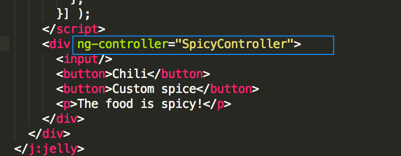
First, let’s set up our controller scope so that it encapsulates the entire form we are working with. To do this, we will reference our controller on the DIV element surrounding the form itself.
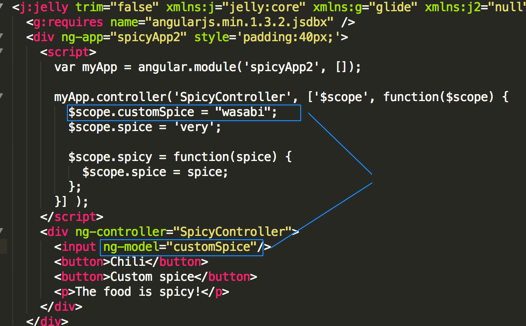
We want the “input” field to go to our “customSpice” scope variable. To do this, we set up a model on that field.
Finally, let’s capture click events on the buttons. When they are clicked, we will call our “spicy” function and send in the spice name appropriate for each button.

To finish this off, let’s add the “spice” variable to our output text so that it shows what spice is currently active.
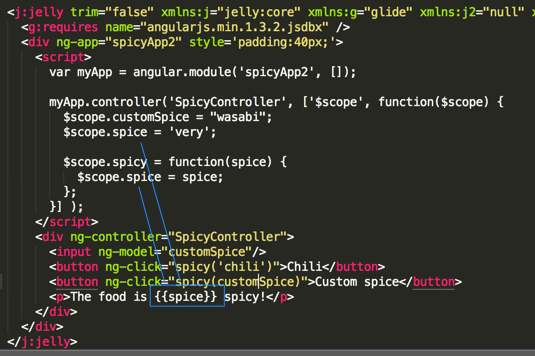
Final Code
1 2 3 4 5 6 7 8 9 10 11 12 13 14 15 16 17 18 19 20 21 22 23 | <j:jelly trim="false" xmlns:j="jelly:core" xmlns:g="glide" xmlns:j2="null" xmlns:g2="null"> <g:requires name="angularjs.min.1.3.2.jsdbx" /> <div ng-app="spicyApp2" style='padding:40px;'> <script> var myApp = angular.module('spicyApp2', []); myApp.controller('SpicyController', ['$scope', function($scope) { $scope.customSpice = "wasabi"; $scope.spice = 'very'; $scope.spicy = function(spice) { $scope.spice = spice; }; }] ); </script> <div ng-controller="SpicyController"> <input ng-model="customSpice"/> <button ng-click="spicy('chili')">Chili</button> <button ng-click="spicy(customSpice)">Custom spice</button> <p>The food is {{spice}} spicy!</p> </div> </div> </j:jelly> |
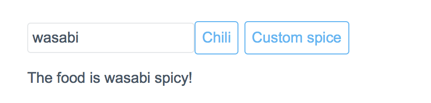
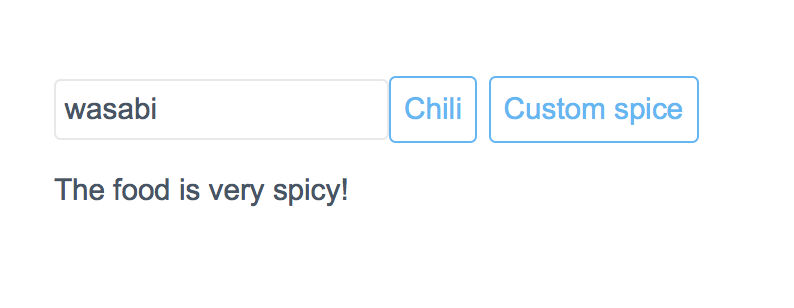
The application in action
Sources
This ServiceNow-based example was primarily derived from the following standard HTML example: