I took a trip down memory lane yesterday to do some research on LDAP operations in ServiceNow. Since I have a long history with Novell as a company, I decided to choose Novell’s eDirectory product as my LDAP source to test against. When trying to import users from eDirectory’s LDAP, I found that some of the settings were a bit different from examples in the system that had obviously been set up using LDAP sources from Active Directory. Here are the steps that I took to get users into an instance, and thereafter perform integration LDAP logins with those users.
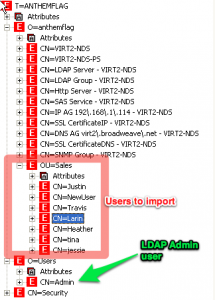
In this example, I am going to work with a fictitious LDAP tree for a company called “Anthem Flag”. The admin user will be contained in a base “Users” organization, while the users I want to import will be contained in the “Sales” organizational unit under the “Anthem Flag” organization. You can see the tree structure in the screenshot below:
Set up the LDAP Server

The first step is to create an LDAP server object within you ServiceNow instance.
You browse to System LDAP -> LDAP Servers in the ServiceNow Navigation Frame. Click “New” to create your new server.
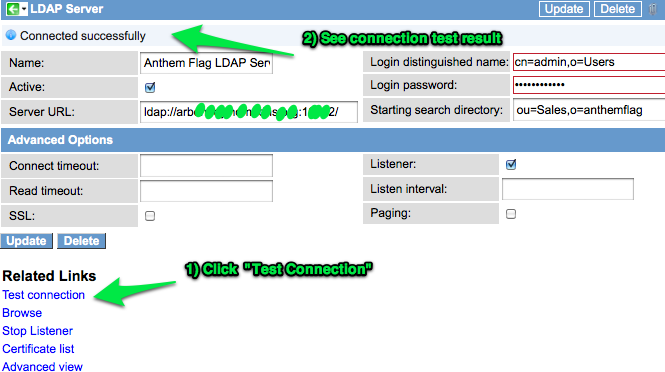
I am going to name my LDAP Server: “Anthem Flag LDAP Server”
The Login Distinguished Name will be the full DN for my LDAP admin user which is: “cn=admin,o=Users”. I’ll also add my admin user’s password as well.
My LDAP Server URL will also need to be entered. It will be entered in the following format: “ldap://myLDAPserverURI:myLDAPport/”
I am also going to give it a starting search directory which will be the Organizational Unit that contains the users I want to import: “ou=Sales,o=anthemflag”.
I like to test my connection at this point to make sure that I have my connection settings entered properly:
Set up the OU Definition
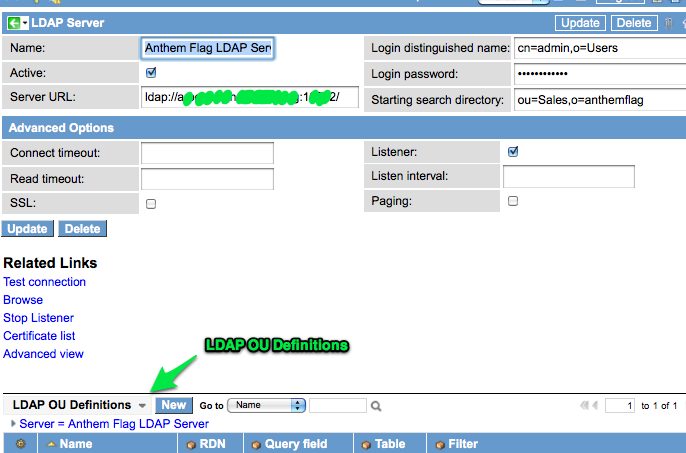
Now that I know my connection is successful, I want to set up an LDAP OU Definition for the Sales OU that I wish to import. You can do this by looking at the bottom of your LDAP Server record for the list called “LDAP OU Definitions”:
Click “New” to start a new OU Definition record.
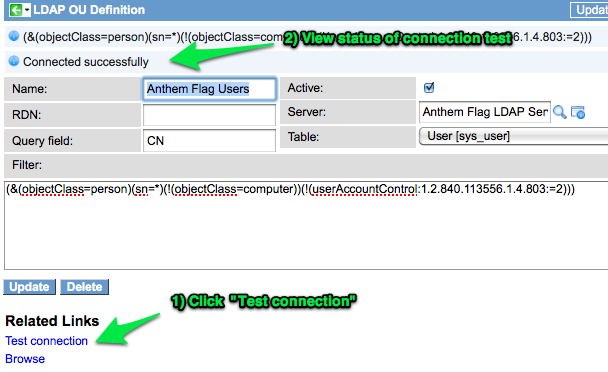
I am going to name this OU Definition record as “Anthem Flag Users” since this is the OU of the users I want to import. I am also going to make sure that my Server field is: Anthem Flag LDAP Server, and that the Table field is set to the sys_user table, since I will be importing users that will be authenticating to the instance.
The Query field will be “CN”, since that is the prefix given to LDAP users in eDirectory. If you have a mixture of objects in the OU such as Computers, Groups, etc, then you may wish to add a filter in the filter field. The one I used was: “(&(objectClass=person)(sn=*)(!(objectClass=computer))(!(userAccountControl:1.2.840.113556.1.4.803:=2)))”. I used that filter, simply because it was in an example User query definition and I didn’t want to do a lot of research here.
Just a quick note on the RDN field. This is the relative distinguished name based on the starting search directory set on the LDAP Server object. Since our users are in the base search directory, I left this blank. However, if I had originally set my search directory to be “o=anthemflag” rather than “ou=Sales,o=anthemflag”, then I would have set my RDN field to “ou=Sales”.
Now I can test the OU Definition connection and filter as in the following screen shot:
Set up the Data Source
Now that we have the LDAP server and ou definition set up, we can create our Data Source record.
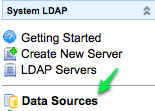
Go to “System LDAP -> Data Sources”, then click “New”.
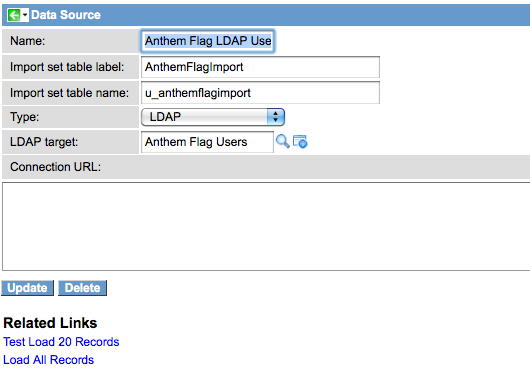
I’ll name my Data Source, “Anthem Flag LDAP Users” since I will be importing my users through this data source.
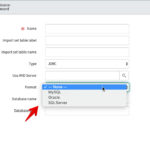
I set the “Import Set Table Label” to be: “AnthemFlagImport”. The “Import Set Table Name” field will automatically be generated as, “u_anthemflagimport”. I then set the “Type” field to LDAP. I then set the “LDAP Target” field to be the “Anthem Flag Users” OU definition.
Here is my Data Source:
Click the “Test Load 20 Records” link to verify that you are getting data from your data source. Once that is verified, we will set up our transform map so that these imported users get mapped properly to the sys_user table.
Set up the Transform Map
On the “Anthem Flag LDAP Users” data source record, go to the bottom of the page under the section for “Transforms”. Click the “New” button.
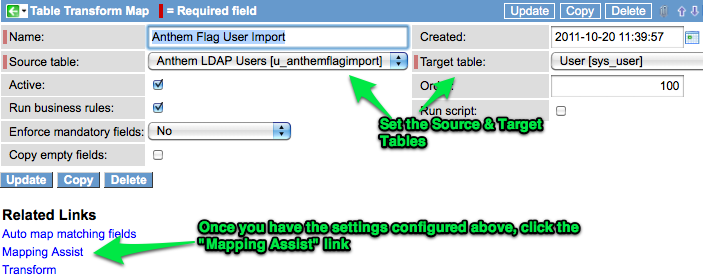
Set up the transform record and then click the “Mapping Assist” link:
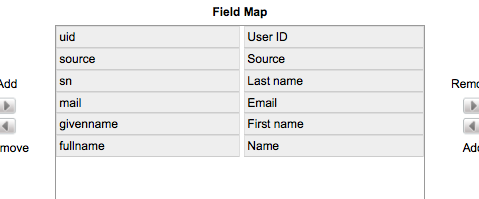
I set my transform map initially as the following field mappings:
Since there is no “LDAP Server” information coming over in my import, I am going to create a “Script” type mapping to the destination sys_table’s “LDAP Server” field.
In order to do this, I will click “New” on the Fields section of the transform map record.
My script will be:
1 | answer = "eecd75a30a0a0b2600791193785025b2"; |
Here is my field map record:
I also don’t want my imported users to have a blank password in the local system, so I am going to set their ServiceNow password to something long. Here is my field map for that as well:
Import and Transform the Users
Now I can run a load and transform to ensure that everything is loaded into the “sys_user” table properly.
To do this, I go to my Data Source and click the ‘Load All Records’ link. Once the data is loaded, I click the “Run Transform” link and run the transform.
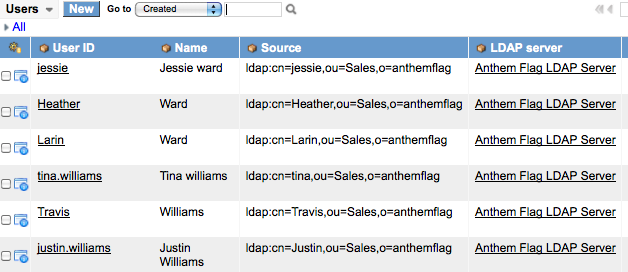
I now browser my “sys_user” table and find that the users were imported successfully:
Login with LDAP credentials
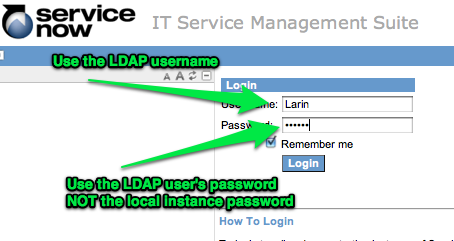
Now that my users are into the system, I can attempt to log into them with their LDAP Credentials:
For the most part, an Active Directory LDAP import and transform would be very similar. The areas that may be different would be in the OU Definition query, and the transform map.





It Is very useful Information about LDAP and SN.
Thanks Much
Very nice and helpful article. I am just curious to know, what are our options in ServiceNow if our user base is changing frequently and we want to synchronize our AD with our ServiceNow Sys_User table on daily basis? Do we have scheduled job available through ServiceNow or do we have to run import everyday? If we run user import everyday, how will handle changes, e.g. if a username for a user changes or a user gets deleted etc?
@Osama – A scheduled import is usually set up for LDAP imports of users. See the wiki at: http://wiki.servicenow.com/index.php?title=LDAP_Integration_Setup#Step_10._Create_and_Execute_a_Scheduled_Import
John,
Is it possible to have SN to authenticate against two IDs? I’m in the process of setting up an LDAP in SN where users have two IDs in the source. The current system is capable of authenticating against either IDs.
@Adminpro, while SN can authenticate against any number of LDAP stores, it is limited to one store per user. UserA may be authenticating against LDAPSourceA, while UserB will be authenticating against LDAPSourceB. However, UserA will not automatically failover to LDAPSourceB if LDAPSourceA goes down.
Hi,
I tried to set up LDAP server in my SN instance. But, whenever i try i am getting.LDAP: Communication error: [Error Message]
LDAP: java.net.UnknownHostException: I have no idea why am i getting that. IP, host everything is perfect and i have imported appropriate certi too.. Any idea why its not connecting?