Anytime anyone wants to talk about security, certificates, and certificate authorities most people zone out as if they were on a dinner date and everyone started to talk about religion or politics (and yes, I love to talk religion and politics).
Besides being able to send and receive signed Web service requests using WS-Security, ServiceNow is also able to consume web services that require mutual authentication. Mutual authentication is also known as mutual SSL authentication, two-way SSL authentication, or certificate-based mutual authentication. With this method of authentication, two parties authenticate to each other by each verifying signed certificates provided by the other entity. This “handshake” process takes place before any web service payload is exchanged.
Please Note: While ServiceNow Web service clients can be configured to make SOAP, REST, or other Web service requests with mutual authentication, operational and data center constraints current prohibit ServiceNow from supporting inbound mutual authentication requests.
Please Note as Well: ServiceNow does not currently (December 2013) support outbound mutual authentication through a MID Server. MID Servers are running within the local network, so this shouldn’t be a big deal since you likely trust the communication within your network more than the internet.
General setup to prepare for Mutual Authentication
Before you can perform mutual authentication, there are some steps that are required to be set up between a client and a server. Within this article, we will refer to ServiceNow as the client, and a third-party service as the server.
STEP 1 – Generate Signed Certificate for ServiceNow
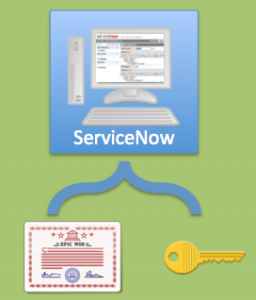
A certificate must be generated and signed for the ServiceNow instance. For demo purposes a self-signed certificate is usually just fine. However, in production systems, you will likely want to generate a certificate and have it signed through a trusted Certificate Authority.
If I were to generate a self-signed certificate for testing, I might do the following:
1 2 | #Generate the certificate, sign it, and create a keystore to put it in keytool -genkey -alias snclient -keyalg RSA -validity 365 -keystore snclient.keystore -storepass abcd1234 -keypass abcd1234 |
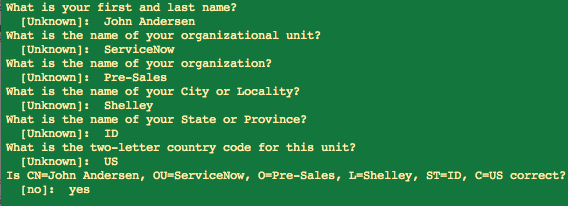
The tool will prompt me with several questions that I can answer:
Once I complete this, my certificate and private key will be generated and stored in a java keystore file named: “snclient.keystore”. Both the keystore and the private key will have a password of “abcd1234”.
STEP 2 – Upload keystore to ServiceNow
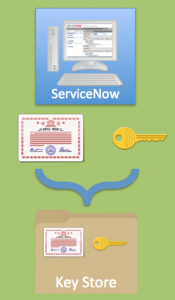
The keystore containing the certificate and private key will need to be uploaded into the ServiceNow instance.
To do this, browse to System Definition > Certificates. Click New. Give the record a name, and then set the Type field to be Java Key Store. Type in the keystore password (in this example, I used “abcd1234”). Finally, attach the keystore file to the record and then click the Submit button.
STEP 3 – Share public certificate with third party service
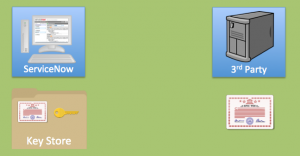
The Public Certificate that was generated for the ServiceNow instance should be shared with the third party service you will be consuming. You can do this in any format that they third party requires. Usually a certificate in the DER format (.cer file) is sufficient. If you had your certificate signed by a Certificate Authority, it is good to send all of the certificates involved in the certificate chain used by the signing authority.
In order to extract the public certificate from the keystore we created, we can issue the following command:
1 | keytool -export -alias snclient -keystore snclient.keystore -storepass abcd1234 -file snclient.cer |
This gives me a public certificate file in the “DER” format by the name of “snclient.cer”. I can now give this to the person managing the third party service so that they can load it into their trust store.
STEP 4 – Load the third party certificate into ServiceNow
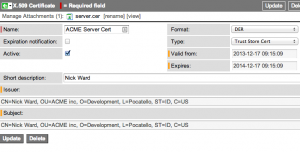
Ask for the third party certificate in either PEM or DER format. If the certificate is involved in a trust chain, ask for the corresponding certificates as well. Load the certificate(s) into the ServiceNow instance by browsing to System Definition > Certificates. Click New. Give the record a name, and then set the Type field to be Trust Store Cert.
If the certificate was in PEM format, set the Format field to PEM and paste the PEM string into the PEM Certificate field on the record. Be sure to include the “—— BEGIN CERTIFICATE ——-” and “———- END CERTIFICATE ———-” strings.
If the certificate was in DER format, set the Format field to DER and attach the certificate file to the record.
After you click Submit the record will be populated through the information in the certificate.
STEP 5 – Set up Mutual Authentication Protocol properties
ServiceNow lets you define your own protocol and port for communicating with an endpoint that requires Mutual Authentication. When you use that protocol class, it triggers the mutual authentication.
For example, I can choose to create a protocol class of “myhttps”. When this protocol class is used in an Endpoint in the system, it automatically triggers mutual authentication over a specified port.
A SOAP request going to “https://myexample.com/SOAPWebService/ticket” will post without Mutual Authentication over HTTPS on port 443.
I can set up two properties in the ServiceNow instance that lets me trigger the mutual authentication.
- glide.httpclient.protocol.DESIREDPREFIXSTRING.class
- glide.httpclient.protocol.DESIREDPREFIXSTRING.port
The first property must be set to the following java class signature: “com.glide.certificates.DBKeyStoreSocketFactory”.
The second property can be set to whatever port the third party is running on (it can even be port 443).
Both properties should have the same DESIREDPREFIXSTRING value in the property name.
For example, let’s say I set the properties up in the following manner:

In this case, if I change my previous SOAP endpoint to be: “myhttps://myexample.com/SOAPWebService/ticket”, this will trigger the request to go over port 6767 and perform a mutual handshake before sending the payload. The key is the “myhttps” protocol prefix. This prefix can be whatever you want, as long as it is not already used by the system.
To view the video demo that covers this and the actual setup/execution of a Mutual Authentication call within ServiceNow, view the How to set up Mutual Authentication video link.





As we expose every ServiceNow table as direct web-service and we do mutual authentication with external system against the soap user or user with soap role.
My doubt is, if we share the user id and password of any user having the soap role to any other system team.Then they will be able to access all the web-services that are exposed on SN Instance.
How can we create a binding between a service and soap user id?
ex – soap.incident user can acess only incident service adn soap.probelm user can acess only problem service..etc.
Regards,
Vamsi Kommireddi
Hi,
Assuming I want to consume different web services provided by differetn companies from my Snow instance.
Is there a way to configure different mutual authntication protocol properties for different services?
will I be able to configure a few sets of system properties with different prefixes (i.e. myhttps1, myhttps2) where each has its own port and its own certificate that is loaded into Snow
@Alex: While I have not tried it, I believe you should be able to do this. That is why the platform allows you to create multiple prefixes. Again, no guarantees, but this is what I have assumed. If you try it, can you reply and let me know?
Nice post, but I can’t get it to work. Before I talk to the 3rd party, I want to make sure that everything is set up correctly on my side, so I have once question: How does ServiceNow know which keystore and certificate to use? If you have multiple keystores and certificates in your system, is there a way to indicate which should be used?
@martijn, I believe these are cycled through until there is a match.
Hello John,
Turns out that ServiceNow randomly picks the keystore / certificate. This causes issues when SSO is also used. There is an open Problem for this with SNOW.
@Martijn – Thanks for letting us know. What is the problem ticket number? I would love to track this.
Hi John,
I have a question regarding posting the soap message in case of mutual authenction.
Normally we post the soap message as below:
var request = new SOAPRequest(“http://www.webservicex.net/stockquote.asmx”);
request.setSoapAction(“http://www.webserviceX.NET/GetQuote”);
request.post(soap, true);
I would like to know how should we post the SOAP message in case of mutual authentication ?
Just want to leave some notes for other people implementing Mutual Authentication.
I had issues using a PKCS12 format Key Store. The logs stated a Handshaking failure. I converted the file to a Java Keystore format using Keytool and it worked.
Also, I only needed to upload the Private Keystore to SN. I did not need to upload the 3rd Party’s Web Services Certificates. This is probably because during the SSL handshaking, the sites public certificate is exchanged at that point. This is also how other Java frameworks are configured, only the Keystore is needed on the client end.
Hi Paul
Could you please provide more details regarding the configurations that you have done for implementing Mutual Authentication ?
Thanks,
Rahul
The issue is acknowledged in PRB597592 and is not scheduled for a fix until Fuji.
Hi, how do we create a CSR which is instance specific. I want to get certificate signed by CA for each of our Service Now instances for establishing Mutual Authentication.